Skimlinks

Wednesday, October 3, 2012

Butternut Squash Lasagna

I love cooking!

First time cooking Butternut Sqash!

This is such a yummy dish!! 

 You will need:
9x13 baking dish & a cookie sheet
1 Large butternut squash
1tbsp of honey
16 oz of cottage cheese
1tbsp of basil
1tbsp of oregano
cloves of fresh garlic (2-6 depending on preference )
10oz frozen chopped spinach
12-16 sheets of lasagna
16oz mozzarella, shredded
Salt & Pepper
 Cut your squash in half & spoon out the seeds.
 Lay the two halves open side down on a cookie sheet & fill sheet with half an inch of water

(I still hear a live version of John Prine in the back of my head singing Happy Enchilada every time I see the term 'half an inch of water' lol)

And bake this at 350 for 45 mins- 1 hour

 Cook your frozen spinach & drain it.
 You can use 1 tbsp of dry oregano, I used my amazing handy little chopper and chopped about 3tbspns fresh oregano instead :)
 Mix the 1tbsp of honey, your cloves of garlic-chopped, your basil & oregano 
(I used the organic gourmet basil blend that comes in a tube in the veggie aisle of your fav grocery store) in a large mixing bowl.
 Add the flesh of your squash and use an immersion blender to make a nice paste. If it is a bit thick, add some of the water from the cookie sheet you baked the squash with.
 In a separate bowl, mix the 16 oz of cottage cheese with your chopped spinach

 
 Spread 1/3 of the squash into the bottom of your pan, covering the bottom.
 Add one layer of lasagna noodles. 
I used the no boil ones. The recipe I found had actually called for whole wheat noodles & I would really like to try it with those some time, but I couldn't find them when I went to the store this trip. Maybe next time =)
 Spread 1/2 of your cottage cheese/spinach mix on top of the noodles.
 Eventually your layers will go as follows (from top)
1/3 squash paste
noodles
1/2 cheese mix
noodles
(I added a layer of mozzarella here that the recipe didn't call for)
1/3 squash paste
noodles
1/2 cheese mix
noodles
1/3 squash paste
 You then cover the top with mozzarella. The recipe called for a cup & a half.
 Bake at 350 for 40-45 mins. Mine was a bit over browned-which is more than okay with me, as I LOVE that 'almost' burnt cheese taste!! But if you don't, I would pull it out of the oven at about 40mins.
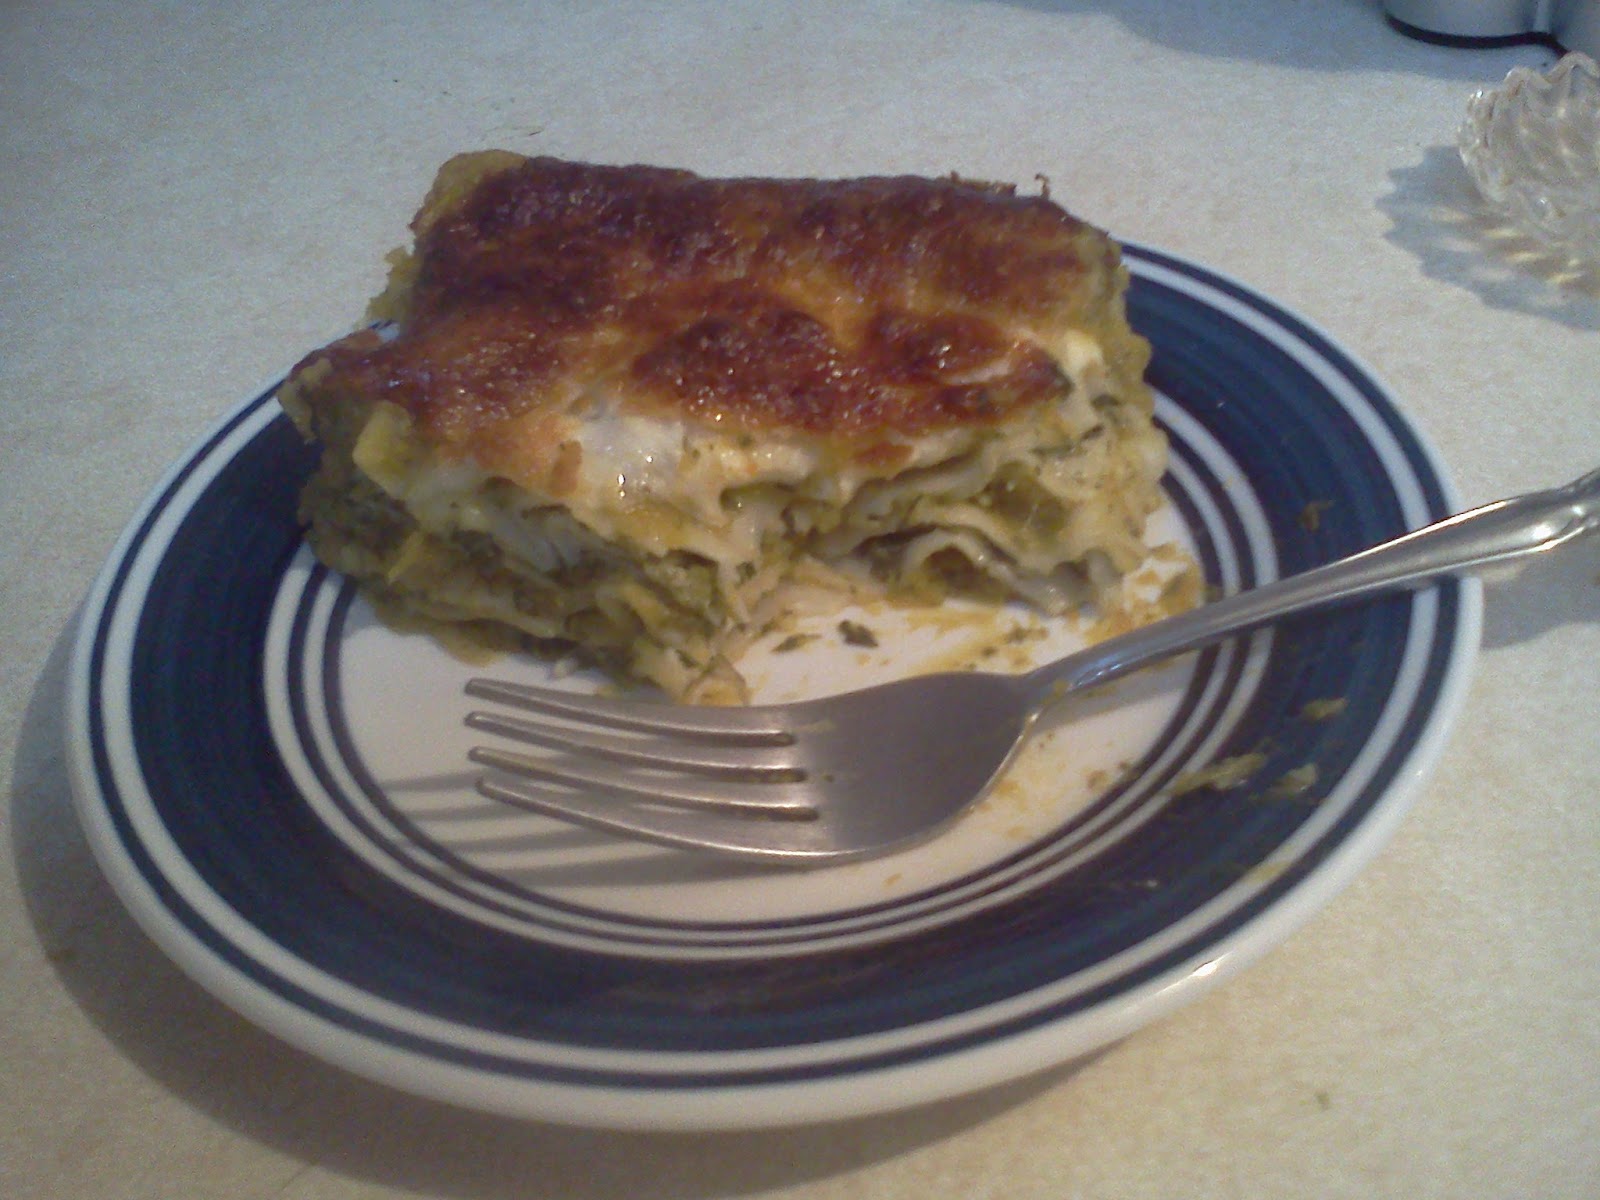
This really was one of my favorite recipes I've cooked yet!! I absolutely love the butternut squash! I've only ever had butternut squash soup & have never cooked the squash at home until now. I really think that even most people who aren't big veggie fans would probably like this if you make it the way I did because it is so cheesy :) Me loves melted cheese!!
This squash I bought from a local farmer, I am very curious to see if I notice a big difference in taste if I ever have to buy one from the grocery store.

Tuesday, October 2, 2012

Juice #18

Monday-Lunch time juice

~Juicing with my power juicer express deluxe~

Strawberries, blackberries, carrots, cucumber, kiwi, lemon, beet, cilantro, kale, celery, spinach, parsley, broccoli & ginger root ;-D

 Strawberries: Folate, potassium, fiber, Vitamin C, manganese
Blackberries: Vitamin E, C, K, folate, magnesium, potassium, copper, fiber & manganese
Carrots: Beta carotene, vitamin A, C, pectin, flourine, potassium
Cucumber: Vitamin A, C, K, pantothenic acid, magnesium, phosphorus, potassium, manganese
Kiwi: Fiber, Vitamin E, C, K, potassium, & copper
Lemon: Thiamin, riboflavin, pantothenic acid, iron, magnesium, fiber, Vitamin C &B6, calcium, potassium & copper
Beet: Folic acid, iron, calcium & potassium
Cilantro: Thiamin, zinc, fiber, Vitamin A, C, E, K, B6, riboflavin, niacin, calcium, iron, magnesium, folate, pantothenic acid, potassium, phosphorus, copper &manganese
Kale: antioxidants, calcium, iron, Vitamin C & A
Celery: Riboflavin, Vitamin B6, K, C, A, pantothenic acid, calcium, magnesium, phosphorus, potassium, manganese, folate
Spinach: antioxidants, potassium, iron, calcium & Vitamin C
Parsley: antioxidants, folic acid, iron, Vitamin A &C
Broccoli: beta carotene, vitamin C, calcium, iron, folic acid & chromium
Ginger Root: vitamin C, manganese, magnesium, copper &potassium & is a natural anti inflammatory.
This made approximately 38oz of delicious juice!! The lemon wasn't the strongest flavor, followed by the beet & then the blackberries, followed closely by the greens. Definitely have to have an appreciation for 'raw' food to really enjoy this particular concoction ;-)

Monday, October 1, 2012

Stuffed Jalapenos

~Bacon - wrapped, stuffed with cream cheese & cheddar~

These are so yumm!!!!

Great appetizer or snack for get togethers or parties!

 Just need cheddar cheese, cream cheese, whatever bacon you prefer & some jalapenos ;-D
 Because I am a MAJOR wimp when it comes to spice, I always completely de-seed them and completely de-rib them (all of the white 'ribbing' inside the pepper)

I STRONGLY suggest you wear gloves the entire time you are handling the inside of these peppers! 
I had made cream cheese stuffed jalapenos before that didn't involve cutting them open, just cut the tops off & used a knife to hollow them out. 
When handling the inside of the pepper, the capcaisen gets on your skin & will BURN your hands for hours afterwards (at least if you are as sensitive as I lol) Was not any fun waiting for that to pass >.<
 I mixed just over one container of cream cheese (Had about 1/4 of a container from last time)
And a couple handfuls of cheddar-maybe two cups? of shredded medium cheddar cheese.
Filled each one, wrapped in 1/2 strip of bacon each & baked at 350 for 30 mins, then put on broil for 5mins but pulled em out after 3, they were just starting to burn.

Putting them on the broil for a few mins at the end really gave them a very nice crispy finish, I would suggest 25 mins at 325 followed by 3 mins under the broiler. 
I had bumped the temp up because I had more peppers than I usually do.

These came out absolutely delicious!! I like them better than just the regular cream cheese stuffed ones I usually make! The cheese filling to pepper ration is more even with this recipe, if that makes sense?

Stuffed Patty Pan Squash/Zucchini

I have discovered, I love cooking!!!

Stuffed zucchini & patty pan squash

Stuffed with quinoa (pronounced 'keen-wa'), shredded Parmesan cheese, spinach, onions, garlic & the flesh from both zucchini & the patty pan

 Here is what you'll need: dry quinoa (pronounced 'keen-wa', this was the first time I've ever cooked with it!)
Patty pan/zucchini (can use either or, I chose to use both
1 cup of broth (I used veggie stock that I had made, the recipe I was following called for beef broth)
 Sea salt & pepper
Sweet yellow onion (I used half a large onion), chopped
About 3 oz of spinach with the stems removed (you can also use a package of frozen spinach, thawed)
Olive oil
Shredded Parmesan cheese, about a cup
Some fresh garlic (amount may vary upon preference, I used about 4 cloves), minced
 Grease a 13x9 baking pan
 Bring the stock/broth to a boil
 Mix in the dry quinoa
 Reduce to low & cook until all liquid absorbed
 Slice a small layer off the bottom of each squash so they will sit flat in the casserole dish
 Slice a thicker strip off the top of each to act as lids
 Spoon out the flesh of each squash. I didn't have room for three zucchini so I cut it down to two
Mix the scooped out flesh of the squash with your minced garlic & diced onion
Heat up some olive oil & cook these until the onions are starting to soften
 Add your spinach & cook 3-5 mins (if using fresh spinach, cook until just starts to wilt)

I waited until this step to preheat the oven, as you do have about half an hour of prep before here. It will get to temp in time.
 Remove from heat and mix in your quinoa & shredded Parmesan cheese
 Mix well (I used my Braun hand held immersion blender to create a nice mix and really mash up the squash well) You may add Sea salt & pepper here to taste, if you like.
Fill each squash & replace lids, drizzle with olive oil
 Cover with foil & bake at 350 for 30 mins, then remove foil & bake an additional 7-10 mins

These came out so delicious!! I did see another recipe that called for portabella mushrooms and I think if you incorporate those into this recipe, it would be even better! The recipe I followed also called for 1/2 lb of ground beef, browned & only use half of the flesh of the squash in the filling. Brown it while the quinoa is cooking and mix it in at the same time as you mix in the Parmesan & quinoa.

These would make a great side dish or just eat a couple as your full meal =)


Sunday, September 30, 2012

My first garden (small, but it's alive & that's what counts lol )

My garden on my porch!

Just a few planters with the first plants I've managed to grow & keep alive :)

These are just a couple of the things I have on my porch:

 My two avocado trees I started from pits in April
My celery plant. In May, I saved the base of a celery cluster & just planted it into the ground and started watering it :)
My one bean plant. I planted four beans in April, all four sprouted. Two of them didn't survive me trying to transplant them into a separate planter. I had the last 2 in one planter for a bit, then I moved them each into bigger planters & the other one died. This one has been string from the beginning & it was the first to sprout.
Today I realized there are little bugs on them, I believe they're aphids, I am going to get some ladybugs to fix that problem! But when I was looking at it closely, I realized I've had beans growing that were hiding under the leaves =D

Juice #17-yummmmm!!!!!

Sunday afternoon yummy fruit juice!!

~Juicing with my Jack LaLanne Power Juicer Express Deluxe ~

Pineapple, pears, kiwis, strawberries, blackberries & oranges!

 Usually, I just grab whatever I see in the fridge and end up with a whole variety of fruits and vegetables. Today I was actually just craving fruit juice and actually thought about what to put together instead of just randomly grabbing stuff ;-D

This made about 40oz delicious fruit juice!!! Mostly I could taste the pineapple and the blackberries followed by the orange, strawberries & kiwis. The pear taste is pretty mild so it's not very noticeable but adds a bit of frothiness to the juice, makes for a very tasty fruit drink!
Strawberries: Folate, potassium, fiber, Vitamin C, manganese
Blackberries: Vitamin E, C, K, folate, magnesium, potassium, copper, fiber & manganese
Pineapple: Bromelain, manganese, Vitamin C
Kiwis: Fiber, Vitamin C, E, K, potassium & copper
Oranges: Natural aspirin & boron
Pear: Vitamin C, Fiber & potassium

The photo after I stirred it does not do it justice! This was such a pretty, frothy purple, was very yummy!! If you go to YouTube you can watch me make this juice and you can see what pretty layers developed in the pitcher before I stirred it up! 
I absolutely LOVE juicing lol!!! It really is so fun and so rewarding and just the variety and amount of minerals & nutrients I am receiving through this beverage is just awesome!!!

Saturday spent working on the car with dad =)

Replacing brake pads (mostly)

~ 9/29/2012~

Saturday, I spent the day with my dad replacing the brake pads on my car and fiddling with a finicky hose ;-)

 Hi everyone!! Sorry I don't have a juice recipe or anything I've cooked to share with you today! I spent the day working on my car with my dad :) Our plan had been to replace the brake pads on both the front and back of the car, the rotors on the back & hopefully to finish installing a hose we had started on a few weeks ago.
 Once we had my lovely 'niece', Annabelle supervising, we were ready to go! She makes sure that the driveway is free of the annoying kitty from around the block and also any dogs walking by ;-)
Well, tire came off well enough! That's a promising start ;-D (kidding, folks, lol ;-) )
 Got the new rotor on!! So shiny!! I couldn't have done any of this without my dad's help and know how around a car :)
 One back corner done =D New pads, new rotor!! Soooooo shiny ;-D
 We had tried starting the brake pads a week prior, but realized it would be much more complicated than it needed to be without the proper tools. Luckily, Autozone has an AWESOME program where you can actually borrow their tools! You place a deposit on the tools while you have it, when you return the tool(s), you receive your entire deposit back so you don't actually have to pay anything for borrowing the tools! This is a tool used to push the piston back into the caliper. Without this, the job would have taken hours longer than it did, it was so very convenient being able to borrow this!!

Once we completed the brake pads on the back, we began to do the ones on the front only to discover that those pads had barely worn down! They had been replaced not long ago and therefore didn't need changing yet =D I can get a few bucks back by taking back the pads I didn't use! So now we tried to finish the power steering hose:
 We had partially installed a hose a few weeks ago that we hadn't been able to complete. Once we were done, a washer was found that we thought needed to go onto the bolt at the end of the hose that attaches to the engine somewhere here.. which meant we needed to unscrew that bolt, put the washer where it belongs, and try to get that bolt in again--It was already a horrendous effort just getting the bolt in the first time *ugh*!

So dad had an idea so we could see what we were doing!! He brought a webcam and I brought my laptop! You can see above, the web cam clipped onto part of the car (the LED lights are on on the camera, makes it easy to spot lol ;-D)
This way we were able to see inside a small tight space and try to get that bolt in. It still took quite some time because the hose has to be maneuvered just right, etc. But after trying for quite some time, dad learned that the washer we had didn't go on there, it was from the old hose so we hadn't needed to unscrew that bolt to begin with X(

But we got it back together =) Still having some issues at the top end of this hose, though. 

But it was very nice to spend the day with dad! Learned a thing or two about working on my car ;-D Got to see one of my sisters a bit and also two of my nephews, and two of my nieces <3 <3